hardieplank installation guide

HardiePlank installation is a comprehensive process requiring precision and adherence to guidelines. It involves preparing the site, using proper tools, and following step-by-step instructions to ensure durability and aesthetic appeal.
What is HardiePlank?
HardiePlank is a highly durable fiber-cement siding product designed for external and internal cladding. It is a versatile, low-maintenance material used for residential and commercial buildings. Known for its strength and resistance to pests, rot, and fire, HardiePlank is a popular choice for exterior wall systems. Available in various finishes, such as primed or ColorPlus, it offers a wide range of design options. With a nominal thickness of 8 mm, it provides a robust solution for cladding needs. HardiePlank is suitable for new constructions and renovations, making it a reliable option for builders and homeowners seeking long-lasting results. Its fiber-cement composition ensures superior performance in diverse climatic conditions, making it a trusted product worldwide.
Benefits of Using HardiePlank
HardiePlank offers exceptional durability, resistance to pests, rot, and fire, making it a superior choice for exterior and interior cladding. Its low-maintenance requirements and long-lasting performance reduce the need for frequent repairs or replacements. The fiber-cement composition ensures stability in various climates, preventing warping or cracking. HardiePlank is also versatile, available in multiple finishes like primed or ColorPlus, allowing it to suit diverse architectural styles. It is resistant to mold and mildew, enhancing indoor air quality. Additionally, it meets stringent building codes and regulations, providing a safe and reliable option for homeowners. Its aesthetic appeal and durability make it a cost-effective investment for both new constructions and renovations, ensuring a timeless look and enhanced property value.

Preparation for Installation
Preparation ensures a smooth installation process. Verify site conditions, store materials properly, and handle planks with care to avoid damage.
Tools and Materials Needed
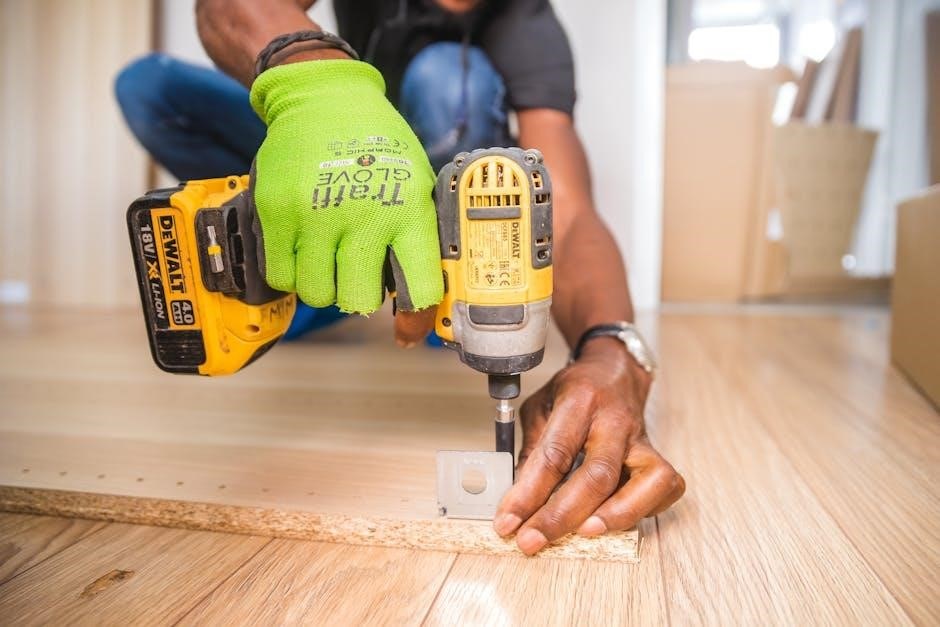
To successfully install HardiePlank, gather essential tools and materials. These include screw guns, utility knives, measuring tapes, levels, and safety gear like gloves and goggles. Additionally, ensure you have weather-resistant fasteners, caulk, and sealants for joints and gaps. Proper storage and handling of materials are critical to prevent damage. Carry planks on edge and avoid exposure to standing water. Refer to the manufacturer’s guidelines for specific product requirements, such as stud spacing and flashing tapes. Having all necessary tools and materials ready ensures a smooth and safe installation process, adhering to best practices outlined in the James Hardie installation manual.
Site Preparation and Safety Measures
Proper site preparation and safety measures are crucial before starting HardiePlank installation. Ensure the area is clear of debris and obstructions. Verify that the structure is sound and studs are properly spaced. Wear protective gear, including gloves and safety goggles, to prevent injuries. Handle planks carefully to avoid damage and injury. Ensure the site is secure, with proper scaffolding and access equipment in place. Follow manufacturer guidelines for temporary weather-tightness, including the use of flashing tapes and seals around windows and doors. Proper storage and handling of materials are essential to prevent damage and ensure a safe working environment.

Installation Steps
Installation begins with proper preparation, followed by precise alignment and fitting of planks. Secure fastening ensures durability, while adherence to guidelines guarantees a professional finish.
Starting the Installation Process
Begin by verifying all materials and tools are on-site and in good condition. Ensure the area is clear of debris and obstructions. Conduct a final safety check, ensuring proper protective gear is worn. Review the installation plan and confirm measurements. Start by marking the wall studs to guide plank placement. Check local building codes and manufacturer recommendations for specific requirements. Ensure the substrate is secure and level. Apply a weather-resistant barrier if necessary. Double-check all tools, such as nail guns and saws, for proper function. Assign tasks to team members to streamline the process. Finally, inspect the first plank for damage before initiating installation. Proper preparation ensures a smooth and efficient process.
Horizontal Installation of HardiePlank
Horizontal installation of HardiePlank involves aligning planks from left to right, ensuring each course is level and securely fastened. Start with the bottom course, using a chalk line to mark the starting point. Each plank should be nailed to studs using galvanized or stainless steel nails, spaced 16-24 inches apart. Blind nailing is preferred to avoid visible fasteners. Maintain a 1/8-inch gap between planks for expansion and contraction. Use a level to ensure planks are straight and properly aligned. Install flashing at joints and around windows and doors to prevent water infiltration. After completing each row, inspect for proper fit and alignment before proceeding. This method ensures a durable and visually appealing exterior finish, adhering to James Hardie’s guidelines for optimal performance.
Aligning and Fitting the Planks
Aligning and fitting HardiePlank planks requires precision to ensure a seamless installation. Begin by marking the wall with a chalk line to guide the first plank’s position, ensuring it is level and plumb. Use a spirit level to verify alignment before securing the plank with fasteners. Planks should be fitted snugly, with joints butted together in moderate contact or with a maximum 1/8-inch gap. Avoid forcing planks into place, as this may cause damage. Test the fit by gently tapping the plank into position. If necessary, use shims to adjust alignment. Proper fitting ensures a professional finish and prevents future issues like warping or gaps. Always handle planks on edge to avoid bending or cracking during installation.
Fastening the Planks Securely
Fastening HardiePlank planks securely is critical for durability and weather resistance. Blind nailing is the preferred method, where nails are driven through the plank’s top edge into the stud. Ensure fasteners are spaced every 16 inches on center and 1 inch from the plank’s edge. Avoid overdriving nails, as this can crack the material. For vertical installations, use corrosion-resistant screws or nails, ensuring they penetrate studs by at least 1 inch. Double-check that all fasteners are snug but not overtightened, as this can cause warping. Proper fastening prevents shifting and ensures a secure, long-lasting installation. Always refer to James Hardie’s guidelines for specific fastening requirements to maintain warranty validity and structural integrity.
Finishing Touches
Finishing touches ensure a polished appearance and long-lasting durability. This step involves handling joints, caulking, sealing, and painting to complete the installation seamlessly and professionally.
Handling Joints and Gaps
Properly managing joints and gaps is crucial for a seamless HardiePlank installation. Begin by ensuring all planks align correctly, with joints staggered to avoid vertical continuity. For horizontal installations, maintain a maximum 1/8-inch gap between planks, as specified in the manufacturer’s guidelines. These small gaps prevent warping and allow for expansion. If desired, caulk these joints to enhance weather tightness and aesthetics. When caulking, use a high-quality, weather-resistant sealant, applying it evenly to fill the gap completely. Avoid overfilling, as this can create an uneven surface. Finally, smooth out the caulk with a damp cloth for a professional finish. Properly sealed joints ensure long-term durability and prevent moisture infiltration, safeguarding the structure beneath the siding. This step is essential for maintaining both functionality and visual appeal. By following these guidelines, installers can achieve a polished and secure installation. Additionally, regular inspections of joints and gaps should be part of ongoing maintenance to address any potential issues early. This attention to detail ensures the siding remains in excellent condition for years to come. Always refer to the latest installation instructions for specific recommendations, as practices may evolve with product advancements.
Caulking and Sealing
Caulking and sealing are critical steps in ensuring the longevity and weather tightness of a HardiePlank installation. Apply high-quality, exterior-grade caulk to all joints, gaps, and seams, including those around windows, doors, and corners. Use a weather-resistant sealant compatible with fibre-cement products to prevent moisture infiltration. For horizontal installations, caulk the gaps between planks if they exceed 1/8 inch. Avoid overfilling, as this can lead to uneven surfaces. Properly tool the caulk to ensure a tight seal, and wipe away excess with a damp cloth. Sealing is particularly important in areas exposed to heavy rain or extreme weather conditions. Always follow the manufacturer’s recommendations for caulking products and application techniques to ensure optimal performance and warranty compliance; Regular inspections and resealing as needed will help maintain the integrity of the installation over time. This step is vital for protecting the structure and preserving the appearance of the siding. By adhering to these guidelines, installers can ensure a durable and visually appealing finish. Additionally, proper caulking prevents costly repairs by addressing potential vulnerabilities early. This attention to detail is essential for achieving a professional-grade installation that withstands the elements effectively.
Painting and Final Inspection
Painting and final inspection are the last steps in completing a HardiePlank installation. Before painting, ensure the surface is clean, dry, and free of dust or debris. Use high-quality, 100% acrylic exterior paint specifically designed for fibre-cement siding. Apply two coats for optimal durability and color retention, allowing the first coat to dry completely before applying the second. During the final inspection, check for any gaps, uneven planks, or improperly sealed joints. Verify that all nails are securely fastened and that the siding aligns properly. Inspect caulking for consistency and coverage, ensuring no areas are left exposed. This step ensures the installation meets both aesthetic and functional standards, providing long-term protection and visual appeal. Proper painting and inspection are crucial for maintaining the siding’s integrity and warranty coverage. Addressing any issues now prevents future problems, ensuring a professional-grade finish.

Maintenance and Troubleshooting
Regularly inspect HardiePlank for damage or wear. Clean surfaces with mild detergent to prevent mold or mildew buildup. Address loose or corroded fasteners promptly to maintain structural integrity and prevent water infiltration, ensuring long-term performance and durability of the siding.
Regular Maintenance Tips
Regular maintenance is essential to prolong the life of HardiePlank siding. Start by inspecting the exterior for cracks, gaps, or damaged planks. Clean the surface with a mild detergent and water to remove dirt and mildew. Ensure all fasteners are secure and replace any that are loose or corroded. Trim back vegetation to prevent moisture buildup. Check caulking around windows and doors, reapplying as needed to maintain a watertight seal. Avoid using harsh chemicals or abrasive cleaners, as they can damage the finish. By following these tips, you can maintain the appearance and durability of your HardiePlank installation for years to come.
Common Issues and Solutions
Common issues with HardiePlank installations include cracking, warping, or improper sealing. Cracks often result from improper fastening or impacts, requiring plank replacement. Warping may occur due to uneven installation or exposure to extreme temperatures, which can be corrected by adjusting fasteners. Improper sealing around joints can lead to water ingress, addressed by re-caulking gaps. Additionally, fading or discoloration can be resolved with touch-up paint. Regular inspections and timely repairs are crucial to prevent minor issues from escalating. Always refer to manufacturer guidelines for solutions to ensure the longevity and performance of the siding. Addressing these common problems promptly helps maintain the integrity and appearance of your HardiePlank installation.
HardiePlank installation, when done correctly, enhances durability and aesthetic appeal. Adhering to guidelines ensures a professional finish, making it a worthwhile investment for any home improvement project.

Final Thoughts on HardiePlank Installation
HardiePlank installation is a rewarding process that enhances both durability and curb appeal when executed correctly. Proper training, adherence to guidelines, and attention to detail are crucial for achieving professional results. Following James Hardie’s best practices ensures longevity and prevents potential issues. Regular maintenance and proper handling of materials are key to preserving the siding’s integrity. By investing time in correct installation and care, homeowners can enjoy a low-maintenance, visually appealing exterior for years. The benefits of HardiePlank siding, such as resistance to pests and harsh weather, make it a valuable investment for any home improvement project.

Importance of Following Guidelines
Adhering to installation guidelines ensures the durability and performance of HardiePlank siding. Proper techniques prevent water damage, structural issues, and warranty voidance. Following James Hardie’s instructions guarantees safety, avoids personal injury risks, and maintains product integrity. Deviating from recommended methods can lead to costly repairs and compromised aesthetics. Compliance with manufacturer protocols is essential for achieving a professional finish and ensuring long-term satisfaction with the siding. By prioritizing guideline adherence, installers can deliver high-quality results that meet industry standards and homeowner expectations, ensuring the siding performs optimally for decades.